Xamarin Forms: Implementing SQLite Database
- Cedric Gabrang

- Sep 3, 2018
- 3 min read
Updated: Feb 2, 2019
SQLite is a software library that provides a relational database management system. The lite in SQLite means light weight in terms of setup, database administration, and required resource.
SQLite is the most widely deployed database in the world with more applications than we can count, including several high-profile projects.
In this post, I will show you how to add the SQLite NuGet packages to a Xamarin.Forms solution, write methods to perform database operations, and use the DependencyService.
So let's get started.
Step 1: Right-click on your solution and click Manage NuGet Packages for Solution.

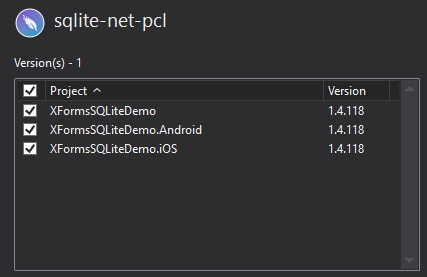
Step 2: Search for "sqlite-net-pcl" by Frank A. Krueger

Step 3: Install the sqlite-net-pcl NuGet package in your projects.
Step 4: Right-click on your PCL project then Add > New Item > Interface. Name it ISQLite.
Step 5: Open your ISQLite.cs and add this code below. This will be later used in our DependencyService

Step 6: As we’re targeting two different platforms(Android & iOS), each with its own rules on how to access the storage space, SQLite needs several things in order to work : a path to where SQLite should store the database file and a custom implementation of the wrapper around the native sqlite3. We will be needing the DependencyService.
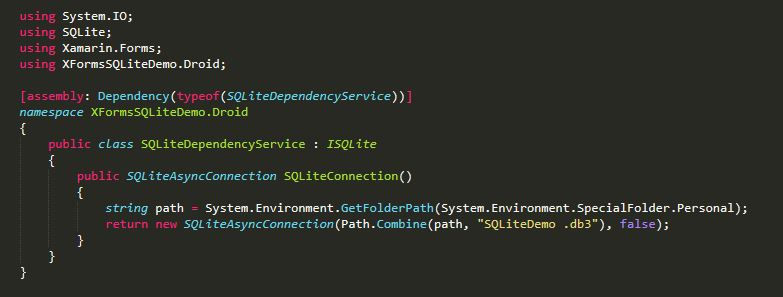
Android Implementation
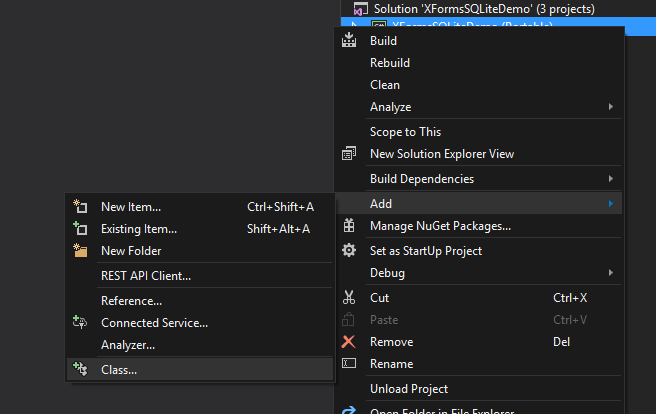
Right-click on your Android project then Add > Class. Then name it SQLiteDependencyService and add this code below:
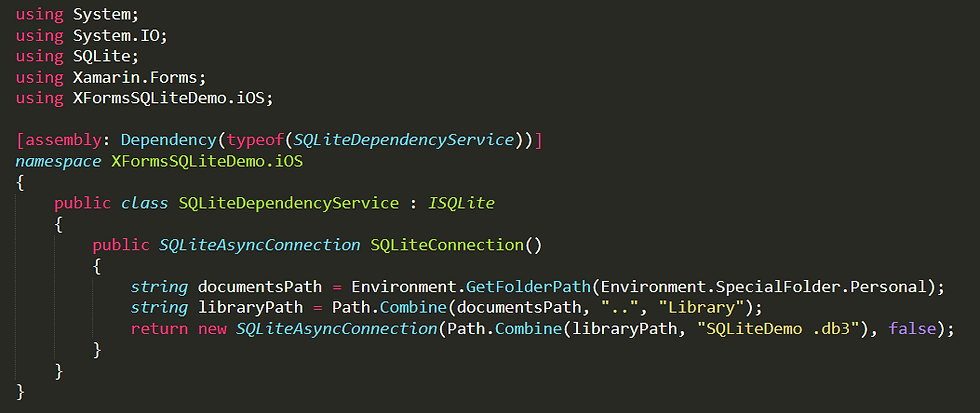
iOS Implementation
Right-click on your iOS project then Add > Class. Then name it SQLiteDependencyService and add this code below:
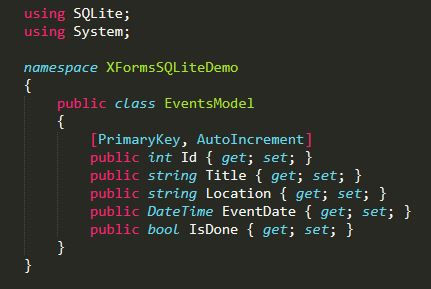
Step 7: Right-click on your PCL project then Add > Class. Then name it EventsModel. This will be your table. The code snippet below illustrates the set up
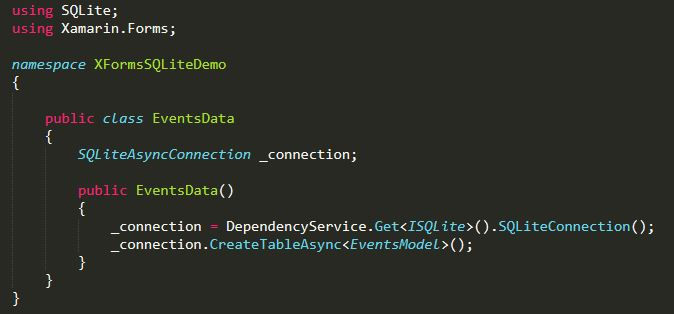
Step 8: Right-click on your PCL project then Add > Class. Then name it EventsData. This will contain your database operations.
Now, let's establish our database connection. First, in your EventsData.cs initialize SQLiteAsyncConnection.
Then, inside your EventsData main method, call the connection we've created on SQLiteDependencyService class by using DependencyService.Get<interface> method.
Then create your table by using CreateTableAsync,
Step 9: SQLite has Select, Insert, Update and Delete for retreiving, insertion, updating or deleting of data respectively. The following snippets show how to perform those operations. Add these snippets in your EventsData class.

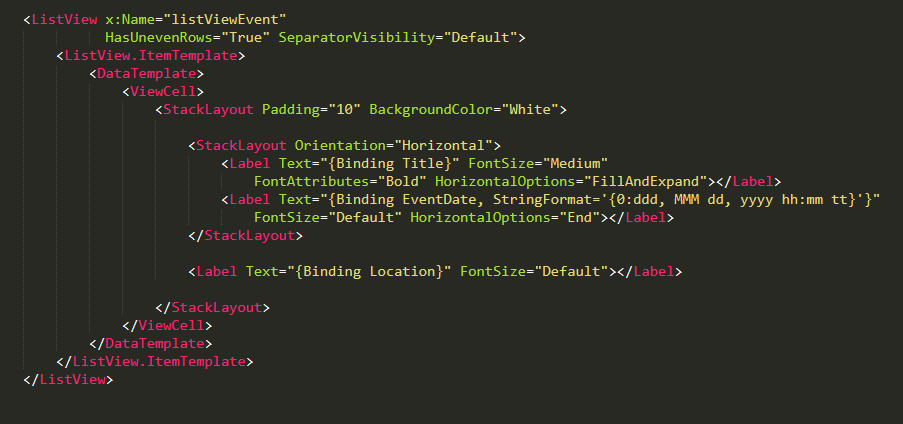
Step 10: Right-click on your PCL project then Add > New Item > Content Page. Then name it EventsListPage. Inside the ContentPage.Content tags, add ListView control.
Step 11: Go to EventsListPage.xaml.cs then create LoadItems method. Then add these codes,

This will set the ItemSource of your listview using GetItemsList() method from EventsData class.
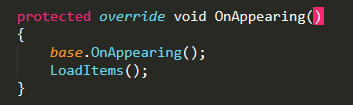
Call LoadItems() in your OnAppearing method.
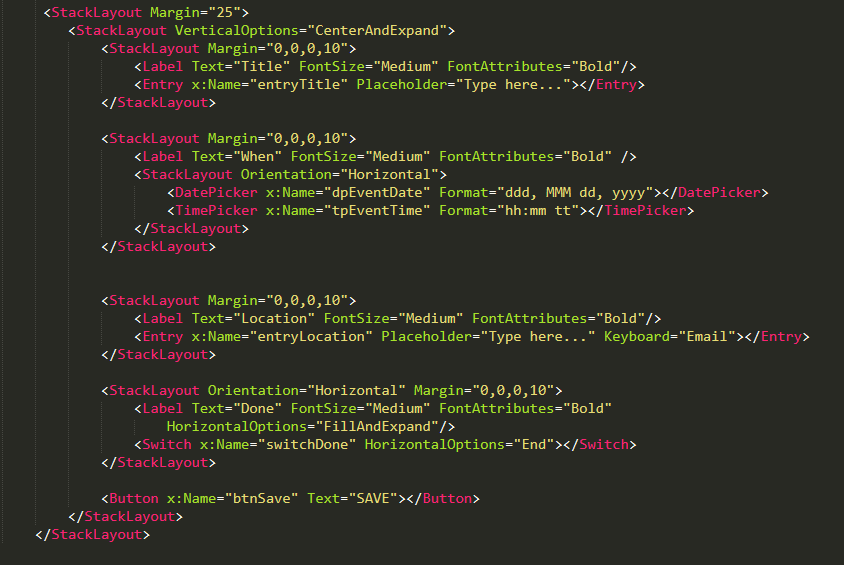
Step 12: Add new Content Page and name it AddEventsPage. Then add this code below to create your layout.
Step 13: Go to AddEventsPage.xaml.cs and declare two(2) static variables.
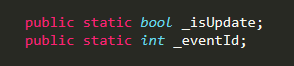
This will be used later to determine whether to save or update an event.
Step 14: Create AddEvent method and add the following codes below,

This will captures all the event's information the user will enter and save it using AddItem() method in your EventsData class.
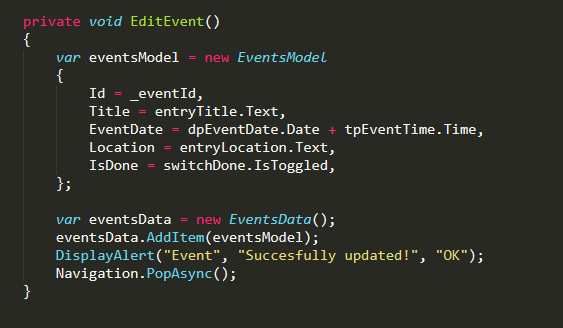
Step 15: Create EditEvent method and add the following codes below,
Step 16: Create LoadEventDetails method and add the following codes below,
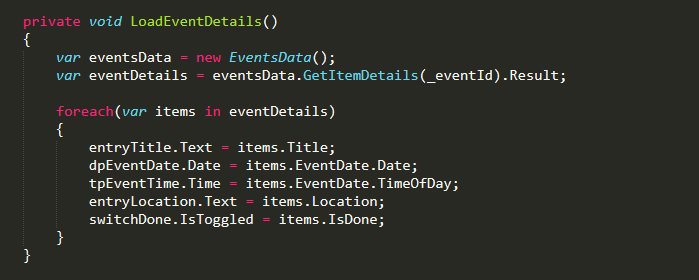
This method will retreive event details using GetItemDetails in your EventsData class referencing to _eventsId;
Step 17: Go back to EventsListPage.xaml and add ToolbarItem just above the ContentPage.Content tags.

As you can see, there's a Clicked event associated with the ToolbarItem. This event will call the AddEventsPage we've created a while ago

Step 18: Build and deploy your app to your emulator or device.
And here’s what the app looks like when is running.
Here’s the GitHub repo to see the complete working code & demo.
Try it yourself! Until next time. Happy coding! #xamarin #android #sqlite #database #localdatabase #programming #programmer #coder #coding #dotnet #visualstudio #visualstudiocommunity
Comments